Bathroom Vanity Hinges
Need a cabinet hinge? It's not so easy to decide what type to get. Learn about 18 different types of cabinet hinges here. All kinds, shapes, sizes, features and specifically different types for various types of cabinets and security needs.

A. Cabinet Hinge Buying Guide
The cabinets in your kitchen, laundry room, or bathroom can serve different purposes, which is why it's important to find the right hinges for the job.
You might think that the style is the most critical factor in choosing a hinge. Although it's a crucial part of finding the best hinge for your cabinets, it's equally as important to find the right type of hinge for the job.
Cabinet hinges come in a variety of finishes, types, and with several different features that make them function a bit differently from one another.
Table of Contents
- A. Cabinet Hinge Buying Guide
- B. Cabinet Hinge Features
- 1. Decorative
- 2. Demountable
- 3. Heavy Duty
- 4. Hidden
- 5. Self-Closing
- 6. Soft Closing
- 3. Cabinet Hinge Types
- 1. Barrel
- 2. Butt
- 3. Face Frame
- 4. Flush
- 5. Full Overlay
- 6. Half Overlay
- 7. Inset
- 8. Invisible
- 9. Offset
- 10. Pivot
- 11. Strap
- 12. Surface Mount (Frameless)
- 13. Wrap Around
- D. More Details
- 1. Types of Hinge Finishes
- 2. Understand Your Door Type
- 3. Measuring for Cabinet Hinges
- 4. Replacing Worn-Out Cabinet Hinges
- E. Where to Buy Cabinet Hinges Online
Related: 15 types of door hinges
B. Cabinet Hinge Features
The features of cabinet hinges reflect the way in which they're used. Some are solely for decorative purposes, whereas others help cabinet doors close in specific ways.
1. Decorative

Source: Amazon
The term "decorative" when relating to hinges can mean one of two things:
- The hinge is intended to be both functional and decorative. It attaches to the door and acts as a hinge, but it has a decorative face that shows on the outside of the cabinet door.
- The hinge is more for decorative than functional purposes. In this case, there might be a true hinge on the inner part of the door, while the decorative hinge is on the outside to add more detail to the cabinets.
The latter type of hinge is sometimes referred to as a faux hinge. Some people use these when they want a specific look but would also like their cabinet doors to be self-closing or soft-closing and can't find a decorative hinge that does meets both their functional and aesthetic preferences.
Non-functional decorative hinges can also come in handy for faux cabinets that are in place for looks but are non-functional because they don't open.
2. Demountable

Source: Amazon
Demountable hinges make it possible to remove the cabinet doors to which they're attached so that you can repair them or clean them. Your kitchen cabinets, especially, can benefit from demountable hinges because you can remove them without removing any hardware for a quick wipe down to clean up grease splatters and other messes. These hinges come in both single and double demountable versions.
You can install single demountable hinges on the cabinet frame, while the other end fits into a slot on the door without any screws. This allows you to slip to door off when you need to without having to remove the hinge.
Double demountable hinges fit into slots both on the door and on the cabinet frame and require no screws to install.
3. Heavy Duty

Source: Amazon
Heavy-duty hinges are the types you'll typically see more in industrial than residential environments. These hinges can hold more weight than regular ones. You might see them in military and medical facilities, for example.
However, you can use these for some cabinets in your home, especially if your cabinets doors are hefty because of their material or because they're oversized. Pivot and barrel hinges are common types of heavy-duty hinges that can hold a lot of weight but allow a door to open and close easily.
Typically, heavy-duty hinges can be up to a ¼-inch thick and are intended for use on doors of at least 1,000 pounds, which isn't usual for a home environment.
4. Hidden

Source: Amazon
A hidden hinge, as the name suggests, is one that you won't see from the outside of the cabinet. These hinges, also sometimes called invisible or concealed hinges can help homeowners achieve the perfect look for their cabinets. Hidden hinges attach only to the inside of the cabinet door and the frame so that the doors appear to float on the face of the cabinet frame.
One of the biggest benefits of a concealed hinge is that you can place them where you need them to go without it impacting the look of your cabinets. If there are slight imperfections in cabinet measurements, your hinges can help conceal those imperfections because you won't notice any differences in their placement from the outside.
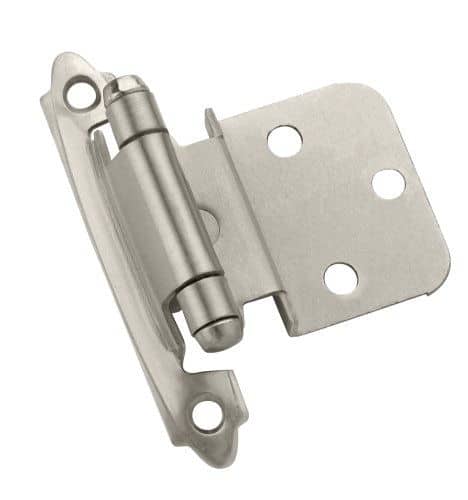
5. Self-Closing
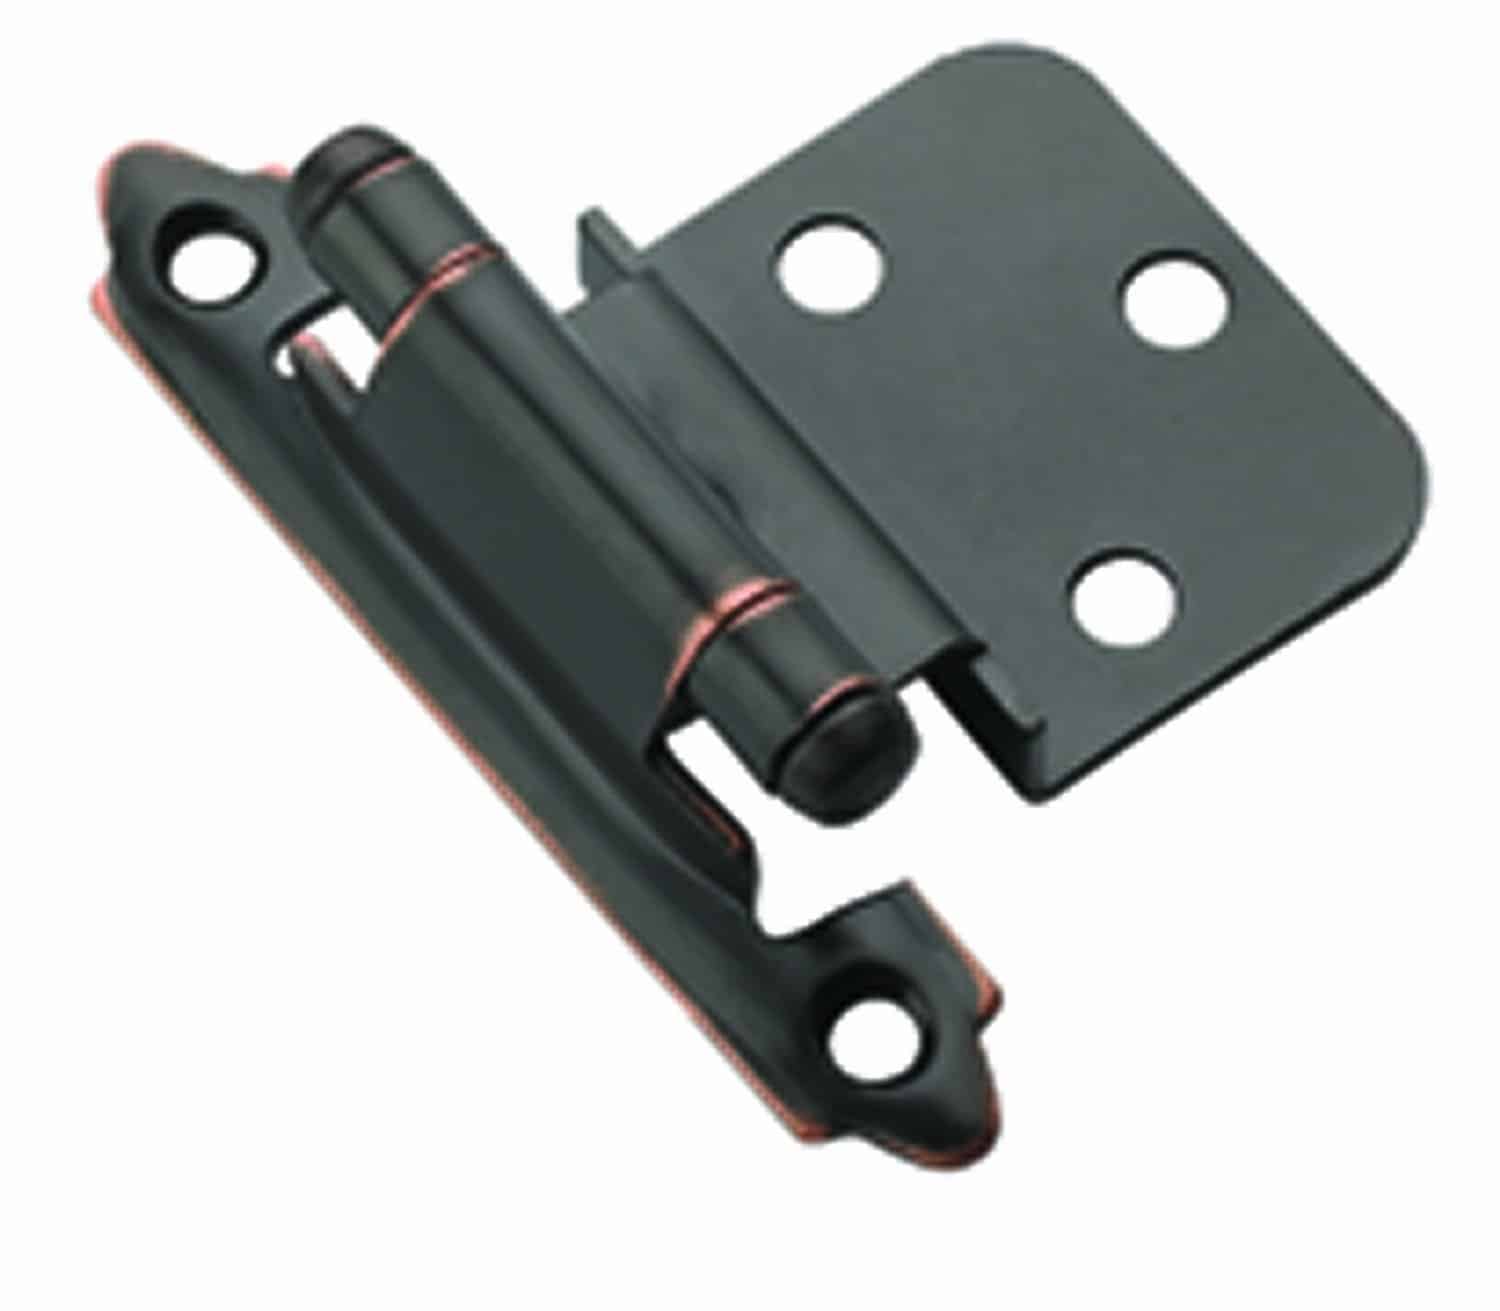
Source: Amazon
Self-closing hinges are often referred to as spring-loaded hinges. However, some don't have springs at all and instead use a hydraulic design. Both designs allow your cabinet doors to close on their own, using their own weight. You'll find this type of hinge often in home theater systems and gym lockers, but it's not uncommon to see in bathroom and kitchen cabinets too.
Spring-loaded hinges have a spring that uncoils when you open the door and then recoils once the pressure against the door leaves. This hinge can wear down over time, especially in cabinets that you use often.
A hydraulic self-closing hinge, on the other hand, uses hydraulic pressure to allow your cabinets to close. When you release the pressure from holding the door open, a vacuum of air within the hinge causes the hinge to close on its own.
A drawback of either type of hinge is that, if they do wear down or malfunction, you could wind up with a door you can't open until you remove and replace the hinges.
VIDEO:
6. Soft Closing

Source: Amazon
Soft closing hinges are like self-closing hinges but differ slightly. Although a self-closing hinge will close a cabinet door for you, it won't always be a quiet close. A soft closing hinge, on the other hand, will stifle the noise a closing cabinet can make, but it's not entirely self-closing.
When you close a cabinet door with a soft close hinge, you'll need to exert some force to push the door closed. Once the door reaches a particular position, though, the hinge takes over, allowing it to glide into the closed position without a slam.
Like a self-closing hydraulic hinge, soft close hinges use hydraulics to create a vacuum that closes the door. The design is such that the door will close slowly, preventing banging as it settles.
3. Cabinet Hinge Types
We discussed some of the features of cabinet hinges that affect the look and feel of your cabinet doors. Now, let's move onto the many types of cabinet hinges that differ in looks and function.
1. Barrel

Source: Amazon
Barrel hinges hide so that you don't see them from the outside of the cabinet doors. People often use these hinges for woodworking projects that have lids, like wooden storage boxes, because they help the lid move up and down without changing the look of the exterior.
However, you can also use them on cabinet doors on which you'd like a hinge-free look. Barrel hinges can come in several depths and diameters, so you'll need to find some that are smaller than the thickness of your cabinet doors and frames.
Using the right size drill bit, you drill two holes, one into the door and the other into the cabinet frame and insert the barrel hinges into them. The arm connecting the ends will allow you to open and close the door.
2. Butt

Source: Amazon
A butt hinge is one of the most common types to use for a variety of doors, including cabinets. These hinges have two sides that fan out. Both sides connect to the joint, allowing them to move freely. You'll attach one side to a cabinet door and the other to the frame of the cabinet. You'll typically see the joint from the outside of the cabinet, so it's important to pick a finish that compliments your cabinet finishes.
Butt hinges can use either a central pin or a ball joint to move. They're meant to be simple, but their simple design also makes them a relatively reliable option for those looking for an easy installation for their project and a hinge that can last for years to come.
Butt hinges do require you to cut a mortise to let the doors close properly. The following video explains how to cut a mortise in your cabinet for an accurate fit:
3. Face Frame

Source: Amazon
Face frame cabinets are the most common style that people choose in the United States. These cabinets have a slight frame going around the opening of the cabinet. You'll need a face frame hinge for these cabinets, which will attach on one side to the door and the other side on the face frame. This is a type of hidden hinge that you won't see from the outside of the cabinet.
The design of this hinge is intended to allow movement on cabinet doors that overlay or sit in front of the face frame. If your cabinets are frameless (i.e., they don't have a face frame), then you'll need a different type of hidden hinge that attaches to the inside of the cabinet frame.
4. Flush

Source: G John's and Sons
A flush hinge is similar to a butt hinge in that it attaches to the inside of the cabinet door and frame. However, these hinges can take up much less room in the door because, when the door closes, the small part of the hinge closes into the large part, making it look like one full piece.
Like a butt joint, you'll see a flush hinge joint from the outside of the cabinet, so pick a finish that you like. The benefit of a flush joint is that you won't have to create a mortise like you would with a butt joint to allow a cabinet door to close correctly.
5. Full Overlay

Source: Amazon
An overlay refers to the way in which your cabinet doors meet up with the cabinet frames. Some doors are installed in front of the face of the cabinet, while others are inset, meaning that they are attached to the inside of the cabinet frame, and the face of the doors sits flush with the frame. Partial overlay cabinets leave a small gap between the doors, which lets you see some of the face frame behind them.
A full overlay hinge is what you'll need for cabinet doors that cover the full face of the cabinet. These can come in many styles, but they typically go inside the cabinet, attaching to the door and either the face frame or the inside of a frameless cabinet.
6. Half Overlay

Source: Amazon
A half overlay hinge is an option you'll want for partial overlay or half overlay cabinets. Half overlay cabinets have two doors that meet in the middle and share a small wall or partition. These hinges attach to the inside of the doors and allow them to open near each other without hitting each other.
These hinges mount to the partition shared by the two doors. They need to be small in size to allow them both to fit on the partition.
7. Inset
Source: Amazon
Inset hinges have one narrow side that attaches to the door frame, while the wider side attaches to the inside of the door. You'll see the narrow part from the outside of the cabinet, which is why you'll usually find inset hinges that have a decorative piece.
Like others, inset hinges come in many finishes and decorative designs to match the design of your cabinets.
8. Invisible

Source: Amazon
An invisible hinge is a term sometimes interchanged with concealed hinges. But, there is an actual type of hinge called an invisible hinge, which looks like the above photo. You'll most commonly see them on home theater systems. You can also use these hinges on metal doors.
These hinges are relatively small and take up very little space inside the door and frame where they attach. Even when you open your cabinet doors, the hinges won't be very noticeable.
9. Offset

Source: Amazon
If you have cabinet doors that protrude slightly from the cabinet frame, then an offset hinge might be what you need to attach them. The two sides of the hinge don't align, which helps the door extend out from the frame. This is especially helpful when you have thick cabinet doors that need to extend out from the frame so that they don't bump the frame when you open them.
These hinges attach to the outside of the cabinet frame and door, so they'll often come in a variety of styles and finishes so that you can find one that works well with your cabinet design.
10. Pivot

Source: Amazon
A pivot hinge is one you'll typically find on lower cabinets or home theater system cabinets. These hinges are best for inset doors on which you don't want hinges visible.
You'll install these hinges on the top and bottom of the cabinet door and frame. The frame will have inset pieces, while the door will have a piece that juts out and fits securely in the inset pieces, allowing it to pivot within the inset piece.
11. Strap

Source: Amazon
A strap hinge gets its name from its strap-like design, with long wings that wrap around the area where a cabinet door meets the frame. They mount on the outside surface of your cabinets, which is why you'll find them in a variety of colors, shapes, textures, and finishes.
Strap hinges can also be very long or short to accommodate the size and weight of your cabinet doors. They're versatile hinges regarding their looks and what they can hold. You'll notice these hinges on gates, usually much longer than those on cabinets, because they can support high weights.
12. Surface Mount (Frameless)

Source: Amazon
Surface mount hinges are another name for frameless door hinges. These mount on the inside of the door and cabinet frame and allow the door to have plenty of room to swing out without hitting the frame. You can usually adjust surface mount hinges to form the right open and close for your cabinets and their doors.
These hinges can be easier to install than others since you won't need to create a mortise before you install them.
13. Wrap Around

Source: Amazon
Wrap around hinges have a face that attaches to the back of the door and another face that wraps around the cabinet frame or face frame, and then inside the cabinet. This type of hinge can give a lot of stability and support to your cabinet doors, especially if they are heavy.
The joint of these hinges will show from the outside of the cabinet, so you'll need to make sure you pick a finish that matches your design.
D. More Details
Now that you know about the types of hinges you might find at the hardware store to complete your cabinet project let's talk about the kinds of finishes for hinges, measuring correctly for hinge installation, and other important details you should know before you pick out your hinges.
1. Types of Hinge Finishes
If you don't plan to buy a hinge that goes inside your cabinets, then you may not be concerned with the way it looks. But, remember that when you open your cabinets, most hinges will at least show a little bit, so you may not want to choose a gold finish when you have all silver hardware in the rest of your kitchen.
Hinges come in a wide variety of styles and finishes that can help you finish your overall look. You might consider buying a sample of a few of your favorite finishes so that you can hold them up to your cabinets and see what one might work best. Or, bring a leftover cabinet piece with you to the hardware store for reference.
Some common finishes are:
- Brass
- Copper
- Black
- Chrome
- Nickel
- White
- Steel
- Stainless steel
2. Understand Your Door Type
We talked briefly about frameless and face frame cabinets and the types of doors you can have on your cabinets, like overlay and inset doors. This piece of information is crucial to understand so that you can get the right type of hinge for your door.
The following video provides a good visual and explanation of how different doors lie:
3. Measuring for Cabinet Hinges
Accurate measurements for your new cabinet hinges is a crucial piece of the puzzle for placing hinges on your cabinets. You'll have to measure your door overlay to come up with a precise measurement for your project.
To measure the overlay, place the cabinet door where it will go once you install the hinges. Place a piece of tape from the door to the frame, almost like a makeshift hinge. Then, open the door and measure the distance from the edge of the tape to the opening of the cabinet. The resulting measurement is the measurement of your overlay.
Make sure your hinge is facing the right way too. A right-hand hinge will be designated as RH, while a left-hand hinge will be designated as LH.
When it comes to measurements for hinges, it's normal to be concerned that you aren't choosing the hinge you need. You can always take photos of your cabinets with you to the hardware store to have an employee help you find the right kind for your cabinet style.
4. Replacing Worn-Out Cabinet Hinges
If you start noticing that your cabinets get squeaky or are starting to stick, then a simple lube might do the trick to get them working again. If not, you may need to replace them.
Fortunately, replacing cabinet hinges can be a simple DIY project, but only if you choose a similar type of hinge that has the same screw hole measurements as your old one.
Try to purchase new hinges from the same company as your old hinges. It will be easier to match the style and measurements so that you can avoid unnecessary holes in your cabinets.
Remove your cabinet doors before removing the hinge completely to avoid harming your doors in the process.
E. Where to Buy Cabinet Hinges Online
If you have a good idea of the type of cabinet hinge you'd like to buy and feel confident buying them online instead of making a trip to the hardware store, we suggest using the following retailers to find what you need:
- Amazon
- Lowe's
- Home Depot
Home Stratosphere Giveaways...
Enter to Win Small Appliances
Top small appliances include a Vitamix blender, Instant Pot, Juicer, Food Processor, Stand Mixer and a Keurig Coffee Maker.
Free Coloring Pages & Books for Kids
Free to download and print.
Download thousands of custom coloring pages and puzzles for your kids.
Source: https://www.homestratosphere.com/types-of-cabinet-hinges/


 Basin wrench eases installation of most faucets. Check price on Amazon